ideas & tips FOR

Decorating a
Living Room

with wall panelling and mouldings

top tip

Add practical character

A beautiful, decorative feature for the home, living room panelling ideas can work well in both traditional and contemporary interiors, adding long-lasting character and charm to your space. 

Living room panelling can add depth and luxurious texture, as well as being a practical addition to your walls for added durability, insulation and protection.

65 products

Tips for a beautiful living room

Geometric Look

Square paneling, also known as Shaker style panelling, creates a uniformed, symmetrical pattern through the elegant placement of squares. 

The neat, grid effect provides a great platform for adding colour, and creates an inviting, textured style that works well in both small and large spaces alike.

The best way to create a unique style and pattern is by using mouldings, which you can then cut down to the specific size you desire.

Add lighting

LED lighting can add an understated elegance and breathe life into the most uninspiring rooms. It can add depth to a room, by creating shadows and lighter points in the space.

Cool mood lighting is a must for perfecting the ambiance in any room. This can be so helpful in a living room. Whether you’re trying to set the right lighting for your movie night or maybe even to get the right ambient lighting for your next social event. And mood lighting, as its name suggests, can genuinely impact how you feel no matter where or how you use it.

Work with your curves

Using curved lines within a home offers a wealth of benefits, including the potential to add both flow and dynamism.

Line is an important consideration in interior design in order to make a room well-balanced and visually pleasing, and here I examine how to introduce curves and the effect they will have.

Advice & FAQ

Why add wall panelling to your living room?

It’s in the name – living room – a room you spend a lot of time in – so why wouldn’t you want to breathe life into it? Geometric panelling is one of the best ways to add some oomph to your living room space. You can make it bold yet minimalistic or busy and flamboyant. You can limit it to a one wall design or install the geometric patterns across the entirety of the walls. Eccentric shades or muted tones, both will work in this room. 

How do I edge the panels?

If you are using the contemporary wall panels or linear wall panels for your walls you can either leave the edge bear if the edge is unseen or for a clean and square edge to your wall panel,moulding No.190 is the perfect contemporary profile and will accommodate all the wall panel thicknesses. If you want a larger moulding to finish the edges or as a skirting,moulding No.198 is a great choice.

How do I incorporate skirting into my panelling layout?

You may want to incorporate a skirting board with your panelling and there are many options to choose from depending on what stye you are looking for, for your home.

If you are using pre-made shaker panelswe recommend complimenting these with a skirting board installed below. The perfect skirting board has been designed to be used with the shaker wall panels and this is skirting No. 193, a tall, detailed skirting board option. Whether you are installing your shaker panels butted up against each other or with spaces between we recommend leaving at least a 50mm gap between the top of your skirting and the bottom of the panel. See all skirting options.

If you are using No.147 wainscoting panelyou can choose from many of our skirting board options,  which you can simply install with adhesive in front of the installed wainscoting panels. See all skirting options.

If you are using pre-made linear or fluted panels, you may decide to add a skirting, whether it be contemporary skirting or traditional skirtingThe linear wall panels have different thicknesses, and you will want to take this into consideration when deciding whether to add a skirting board.

If you install the skirting in front of the wall panels be aware that if the panel you have chosen has deep recesses, you will still have those gaps sitting behind the skirting. Therefore, we recommend installing a skirting board No.198 which works perfectly with all the contemporary wall panels.

If you want to use a different style of skirting below the wall paneling and if you want the skirting to sit flush at the bottom, we recommend installing a packer board behind to bring the skirting forward.

Are the wall mouldings and panelling durable?

The range of wall panels and mouldings are perfect for high traffic areas as they are durable and waterproof. The panels arrive in a white primed colour ready for painting and for the most durable finish on your wall panelling we recommend using Mylands Wood & Metal Paint to finish your panels.

What paint should I use to paint the panelling?

We recommend using Mylands Wood & Metal Paint which are good for both interior and exterior and come in three different finishes: Matt, Eggshell or Gloss. As well as a fantastic selection of paint colours to choose from the paint is extremely durable with a high-quality finish. The Mylands Wood & Metal paint is unparalleled in terms of its performance: scrubbable, sprayable and durable it is perfect for high traffic areas.

Dado vs. Picture Rail

Dado Rail

In the 17th century, chairs and other pieces of furniture were stored against the walls and were only moved into the central space when in use. For this reason dado rails and wainscoting were introduced to shield the walls from scuffs and knocks whilst protecting the walls. – See full blog.

Picture Rail

The term "picture rail" refers to a wall moulding that is installed horizontally around a room and usually sits about 30cm to 50cm below the ceiling in a room. Usually found in period properties with tall ceiling heights, a picture rail is not just a decorative moulding, it has a very specific purpose and, just as the name suggests, it is used to hang pictures from.

We supply a fantastic range of mouldings that look like picture mouldings, which are lightweight and easy to install, however this does mean that the mouldings are not strong enough to be used for hanging pictures from.

This does not stop you from using mouldings as picture rails in your wall designs, because it still makes for a beautiful design feature which is elegant and creates balance in rooms with tall ceilings.

How do I deal with power points and switches when fitting my panelling?

We would advise you to consult an electrician if you intend to relocate your socket or if you are not comfortable with removing and replacing the front plates of sockets or switches. In order to fit your panel, you will need to remove the front plate of the switch or socket.

Offer your wall panel up to your wall in the location of where you are installing the panels and review the location of the socket. You may want to tweak the overall location of the panels once you see where the sockets sit in relation to panel edges. Once you are happy with the location, mark up the location points of the socket onto the panel.

Take the marked-up panel to your cutting area along with the front plate of the plug socket or switch and mark all around the size of the socket or switch plate onto the front of your wall panel.

Using a fresh bladed saw make a plunge cut into the centre of the panel and cut the shape of your socket or switch out of the material. You are nearly ready to install.

Apply adhesive all around the rear perimeter of your panel and along the centre line and you should apply a modest amount of adhesive along the inside edges of the hole you have created. Mount your panel to the wall in the marked-up location, apply pressure. Reconnect your wiring (or have your electrician do it) and slide the plate back into the hole and fix.

What is difference between panelling and mouldings?

Panelling referes to the overall decorative design on a wall which visually looks like frames or rectangles. Panelling is a traditional style which adds character and warmth to a room. We offer pre-made full panels which can be adhered to the wall making installation very simple. These pre-made panels come in a set size.

Wall moulding, are decorative profiles that are sold in 2m lengths. These lengths can be cut to size and mitred up into rectangles to create the panelling look. The moulding lengths are a versatile option because it allows you to create the exact sized panels that your wall requires.

Do the wall panels have acoustic properties?

Acoustic panels for walls are required in rooms where you want to enhance and improve the quality of sound within it. One of the great things about some of the wall panels in our range is that they have acoustic properties, making the panels the perfect choice for TV rooms or media rooms where you want to improve the sound. Our wall panel range has beautiful designs that have acoustic properties, absorbing up to 25% of the conversation, and these include, No.108 Zigzags ,No.110 Hills ,No.109 Valleys & No.130 Chevrons. See more about Acoustic wall panels.

Do the wall panels have thermal properties?

One of the great things about some of the wall panels in our range is that they have thermal properties, making the panels the perfect choice for rooms where you want to stabilise the temperature.The Purotouch material that the wall panels are made of has high insulting properties making the following wall panels have similar insulating effects as a standard insulating board of the same thickness. These panels include, No.108 Zigzags, No.110 Hills, No.109 Valleys & No.130 Chevrons. See more about Thermal wall panels.

How do I to choose the right mouldings or panels?

We offer a large range of options for wall panels and mouldings and the possiblities are endless. Whether you are looking to create a contemporary style or traditional charm, we can help you choose the perfect wall mouldings and wall panels for your room.

How much do I need to order?

How much product you need will depend on your project, your walls and which products you are purchasing.

How to measure for Coving or Skirting:

Measure and note down the overall lengths of each of your walls. (Removing gaps from the measurements such as doors if you are ordering skirting) The coving profiles are sold in 2metre lengths. You can either add up all the wall lengths into one total, then divide by 2 to figure out the total number of profiles you need to order. Alternatively and if you want fewer joints in your coving/skirting, you can look at each length of wall and work out how many 2metre lengths will fit in the space. If you do it this way you may end up with more wastage.

Tip - Make sure to add a little bit extra to your order incase you make any mistakes with cutting!

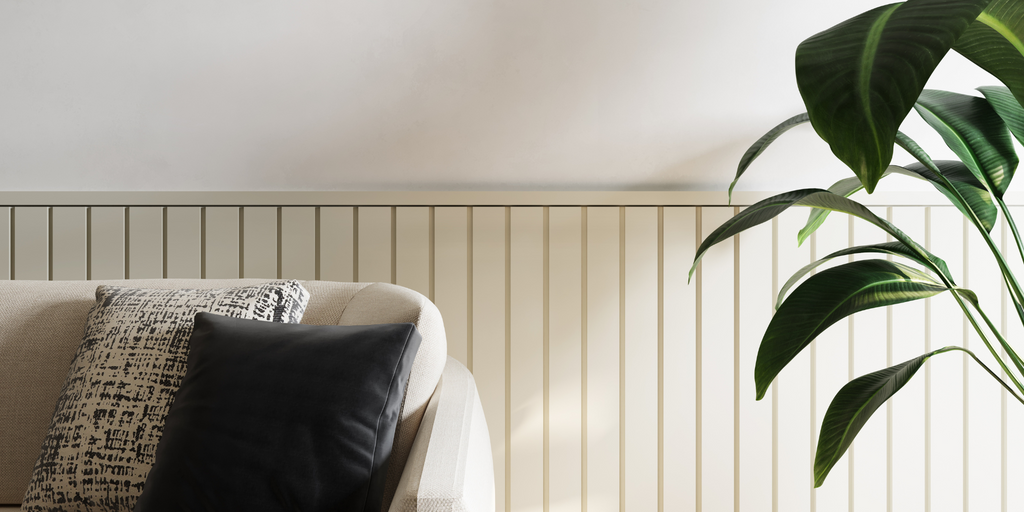
How to measure for Contemporary Wall Panels

These panels come in standard 200cm x 25cm sizes. Generally these will be fitted side by side to fill a wall or area. Measure the overall width you want to cover (in cm) and divde by 25cm (which is the panel width) This will tell you how many panels you require.

Alternatively, you can work out how many panels you need by measuring your overall square meterage required. x2 panels = 1msq. Therefore if you have a wall of 12msq that you want to cover, times that figure by x2 and that will give you the total number of panels.

Tip - Always add a little bit extra to your order incase you make any mistakes with cutting!

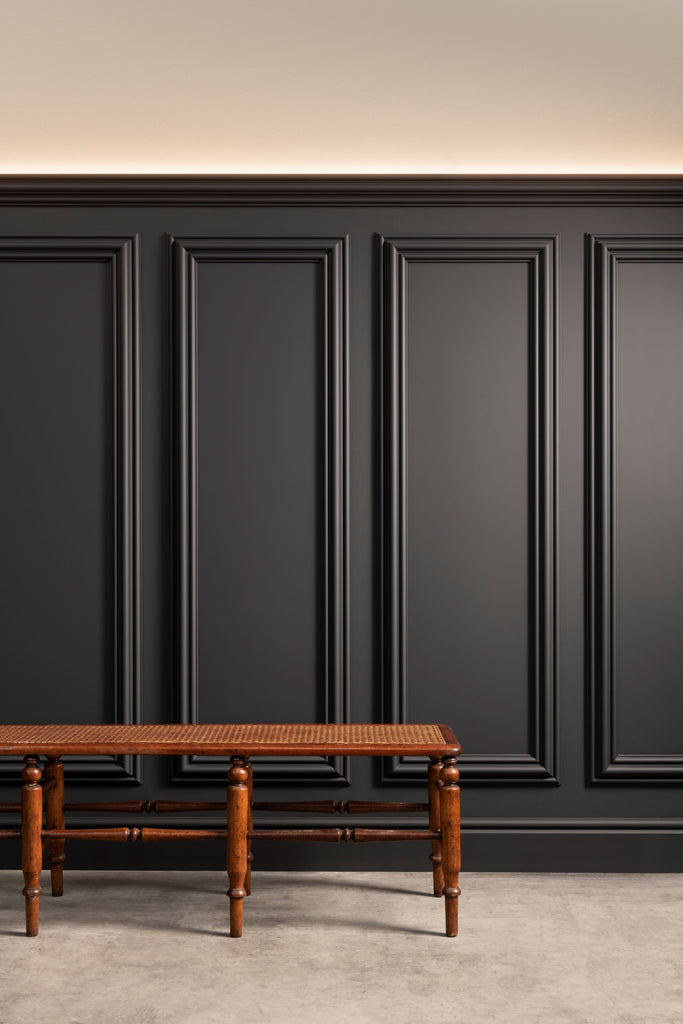
How to Measure for Shaker nos 120 and 121 wall panels

These panels come in two set sizes: panel no: 120 measures 150cm x 50cm and panel no: 121 measures 50cm x 50cm.  Work out the area you wish to panel. This may be the full wall height, or perhaps half height would be preferable for your space, depending on furniture arrangements, as well as the position of any windows and/or doors.

Work out how many of the panels will fit across the space width-wise – remember, you can of course use the no: 120 panel either vertically or horizontally.  If the panels do not fit exactly in the space you have, calculate the number of whole panels you can fit, and then divide the remaining space on the wall by the number of panels + 1.  For example a wall of 2.4m in width could accommodate 4 panels (positioned vertically) with 40cm remaining.  Then divide 40cm by 5 to find the size of the gap you should leave between each panel = 8cm.

A popular design is to position the long rectangular panels (no: 120) vertically, with smaller square panels (no: 121) either above or below them. (insert image?)  Try to work out the gaps to be equal vertically as they are horizontally, to give your design a better balance.  Eg. if the gaps horizontally are 8cm, then leave an 8cm gap between the larger and smaller panel vertically too.

If you are panelling only to half height, you can choose a wall moulding to finish the panelled area neatly (insert image?). Our moulding no: 4025 has a very similar profile to the Shaker panels and adds a smart dado rail-style edge to the panelling.  We also supply our coving/moulding no: 324 which can hide LED lighting, which can throw a soft lighting effect either above or onto the panelling itself.

If you prefer, the moulding no: 4025 can also be used to make ‘bespoke’ panels, to be used in conjunction with the set sized Shaker panels.  To do this, simply measure the perimeter of the panel size you wish to create (in cm).  The moulding comes in 2m lengths, so divide the perimeter length by 200 to calculate how many lengths you will need.

If you need any help with your order please get in touch and we would be delighted to help.

How to install & finish the panelling

Sand down any obvious imperfections on your wall/surface and wipe down the surface after making sure it is free from dust.

Before you start fitting ensure that the walls are dry and grease free.

Installing over a painted surface

*If your existing surface is painted, it is very important that the paint has a clean, dry and non-greasy surface. It goes without saying that the paint adhesion must be good. It is important to always sand off any remaining dirt and loose paint.

Installing over wallpaper

It is best to remove the wallpaper before you install the products. If necessary, you can cut and remove the relevant sections. If this is not possible, use DecoFix Power as the glue to affix the products.

All of the products are to be fitted to your surface using adhesive glue.

There are three adhesives that are recommended which have different uses. Please see the below question about adhesives for details about which ones you should choose for your application.

Please see the recommended adhesives here.

We recommend using Mylands Wood & Metal Paint which are good for both interior and exterior and come in three different finishes: Matt, Eggshell or Gloss. Extremely durable with a high quality finish in each category, the Wood & Metal paint is unparalleled in terms of its performance: scrubbable, sprayable and durable it is perfect for high traffic areas.

Product Gallery

You might be surprised at the versatility of wall paneling and how it can be incorporated into the space. From rustic and traditional to contemporary and sleek, paneling can be used in myriad ways to transform a room from boring to stylish. It is a simple way to add character to a room that is often the most used, regardless of its size or style.