ideas & tips FOR

3/4 Height
Wall Panelling

with wall panelling and mouldings

top tip

Refresh your walls

3/4 height panelling is fantastic if you wanted to create a subtle two tone colour palette in the room. You can also add in some statement coving that may come a bit further down the wall.

3/4 panelling works well if you want to add LED lighting to the room. This is because it would provide the correct height to add a bit of lighting to the space. Create atmosphere & mood. You can also finish off the 3/4 height panelling with a dado or picture rail.

65 products

Tips for adding 3/4 height panelling to your space

Create a colour palette

While many homeowners are growing ever bolder with their colour choices in the home, many of us don't want entire swathes of bright pink or dark blue in a room after painting a wall.

Splitting a wall up with panelling provides the opportunity to go a bit wilder and more daring with hues either above or below the middle without completely overwhelming the space. 

Add lighting

If you’re going wall to wall in one colour, the addition of panelling will create an instant lift by creating light and shade on what would have been a flat wall. Adding LED strips to your panelled wall will enhance this further.

Keep it simple

Keeping the design minimalistic but adding great texture to the room with the valleys wall panelling. Cutting off the wall panelling so it’s not full height is great if you have something like a statement chandelier, so the wall panelling is not taking away from that. 

Advice & FAQ

How do I edge the panels?

If you are using the contemporary wall panels or linear wall panels for your walls you can either leave the edge bear if the edge is unseen or for a clean and square edge to your wall panel, moulding No.190 is the perfect contemporary profile and will accommodate all the wall panel thicknesses.

The wall panels have varying thicknesses depending on which panel you are interested in and so there are many options for moulding profiles you could use to finish the edges. You will just need to make sure that the moulding you choose is the right depth to cover the thickness of your panel. Follow the links to see the full range of wall mouldings and cornice.

How do I measure up for 3/4 height panelling?

We offer a great selection of linear panelling that are all 2 metres in length, if you had a standard height room which is about 2.4 metres in height these panels would be perfect for you if you are looking at creating ¾ height panelling. The collection of premade shaker style wall panels are 1.5 metres in height meaning depending on the spacing at the bottom of the panelling or the skirting you may be using these would also work for you. Another option for you to create a bespoke ¾ height design would be to use wall mouldings to create your panelling.

Installing your wall panelling at around the 2 metre height will suit most rooms with a standard height ceiling. If you have taller ceilings in your home, you could raise this height a little.

TOP TIP – Use some masking tape and run it around your room at the height you are thinking of, stand back and have a look. Rooms are always different sizes and proportions and sometimes it is best to mark it up and take look, it will become obvious what works visually in your room.

Are the wall mouldings and panelling durable?

The range of wall panels and mouldings are perfect for high traffic areas as they are durable and waterproof. The panels arrive in a white primed colour ready for painting and for the most durable finish on your wall panelling we recommend using Mylands Wood & Metal Paint to finish your panels.

What paint should I use to paint the panelling?

We recommend using Mylands Wood & Metal Paint which are good for both interior and exterior and come in three different finishes: Matt, Eggshell or Gloss. As well as a fantastic selection of paint colours to choose from the paint is extremely durable with a high-quality finish. The Mylands Wood & Metal paint is unparalleled in terms of its performance: scrubbable, sprayable and durable it is perfect for high traffic areas.

How do I incorporate skirting into my panelling layout?

You may want to incorporate a skirting board with your panelling and there are many options to choose from depending on what stye you are looking for, for your home.

If you are using pre-made shaker panelswe recommend complimenting these with a skirting board installed below. The perfect skirting board has been designed to be used with the shaker wall panels and this is skirting No. 193, a tall, detailed skirting board option. Whether you are installing your shaker panels butted up against each other or with spaces between we recommend leaving at least a 50mm gap between the top of your skirting and the bottom of the panel. See all skirting options.

If you are using No.147 wainscoting panelyou can choose from many of our skirting board options,  which you can simply install with adhesive in front of the installed wainscoting panels. See all skirting options.

If you are using pre-made linear or fluted panels, you may decide to add a skirting, whether it be contemporary skirting or traditional skirtingThe linear wall panels have different thicknesses, and you will want to take this into consideration when deciding whether to add a skirting board.

If you install the skirting in front of the wall panels be aware that if the panel you have chosen has deep recesses, you will still have those gaps sitting behind the skirting. Therefore, we recommend installing a skirting board No.198 which works perfectly with all the contemporary wall panels.

If you want to use a different style of skirting below the wall paneling and if you want the skirting to sit flush at the bottom, we recommend installing a packer board behind to bring the skirting forward.

How do I deal with power points and switches when fitting my panelling?

We would advise you to consult an electrician if you intend to relocate your socket or if you are not comfortable with removing and replacing the front plates of sockets or switches. In order to fit your panel, you will need to remove the front plate of the switch or socket.

Offer your wall panel up to your wall in the location of where you are installing the panels and review the location of the socket. You may want to tweak the overall location of the panels once you see where the sockets sit in relation to panel edges. Once you are happy with the location, mark up the location points of the socket onto the panel.

Take the marked-up panel to your cutting area along with the front plate of the plug socket or switch and mark all around the size of the socket or switch plate onto the front of your wall panel.

Using a fresh bladed saw make a plunge cut into the centre of the panel and cut the shape of your socket or switch out of the material. You are nearly ready to install.

Apply adhesive all around the rear perimeter of your panel and along the centre line and you should apply a modest amount of adhesive along the inside edges of the hole you have created. Mount your panel to the wall in the marked-up location, apply pressure. Reconnect your wiring (or have your electrician do it) and slide the plate back into the hole and fix.

What is a picture rail?

The term "picture rail" refers to a wall moulding that is installed horizontally around a room and usually sits about 30cm to 50cm below the ceiling in a room. Usually found in period properties with tall ceiling heights, a picture rail is not just a decorative moulding, it has a very specific purpose and, just as the name suggests, it is used to hang pictures from.

We supply a fantastic range of mouldings that look like picture mouldings, which are lightweight and easy to install, however this does mean that the mouldings are not strong enough to be used for hanging pictures from.

This does not stop you from using mouldings as picture rails in your wall designs, because it still makes for a beautiful design feature which is elegant and creates balance in rooms with tall ceilings.

Installation Information, Painting & Finishing

Preperation

When your products arrive, unpack them and lay them out on the floor so you can check you have enough for your project. Store the products and adhesives at room temperature and wait 24 hours before installing

Sand down any obvious imperfections on your wall/surface and wipe down the surface after making sure it is free from dust.

Before you start fitting ensure that the walls are dry and grease free.

Mark Up

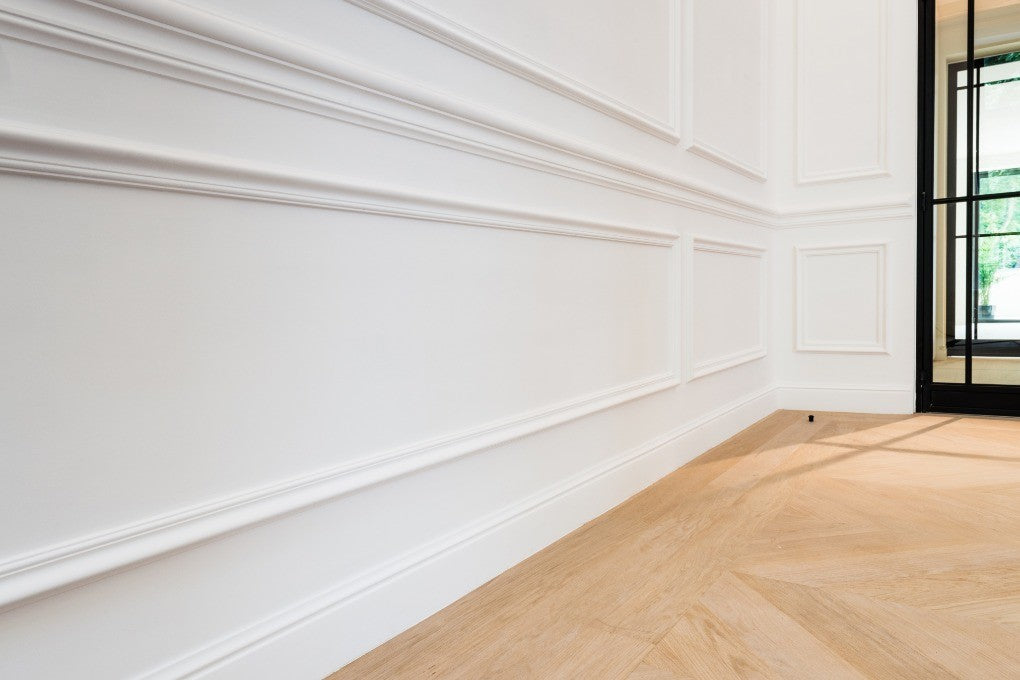
Plan out and mark up the location of where you want to fit the moulding/panelling onto the wall using a spirit level.

If you are installing a skirting board, always start with this. Always start your project from the bottom of the wall upwards.

Cutting

The material cuts just like wood, so once you have measured up, simply cut your moulding/panelling with a fresh bladed saw.

Glueing Up

Apply the DecoFix Power adhesive to the rear face of your moulding/panelling making sure to run a bead of adhesive along the length if you are using a moulding or for larger mouldings/panels all around the perimetre and a bead down the center aswell.

Fitting

Line up the moulding/panel against the wall, press firmly and remove any excess glue with a cloth or sponge.

If you are fitting items side by side make sure you are using the correct adhesive - see all adhesive products

*Make sure you leave a 1mm expansion gap around panels.

Finishing

Use the DecoFix Filler to smooth out any joints using a application gun along the joins. Use your finger or a lightly damp sponge to smooth out the filler along the join or seam. If you are using vertical wall panels run the filler along all the vertical seams and use a damp sponge to smooth the filler in an upward direction.

Wait 15 minutes and then gently sand any areas that you think need sanding a little.

Painting

Now your mouldings or panels have been installed you can paint them, either by hand or with a spray gun. We recommend using Myland Wood & Metal paint for the most durable finish.

Once your mouldings or panels have been installed you can paint them, either by hand or with a spray gun.

We recommend using Mylands Wood & Metal Paint which are good for both interior and exterior and come in three different finishes: Matt, Eggshell or Gloss. Extremely durable with a high quality finish in each category, the Wood & Metal paint is unparalleled in terms of its performance: scrubbable, sprayable and durable it is perfect for high traffic areas.

How much do I need to order?

How much product you need will depend on your project, your walls and which products you are purchasing.

How to measure for Coving or Skirting:

Measure and note down the overall lengths of each of your walls. (Removing gaps from the measurements such as doors if you are ordering skirting) The coving profiles are sold in 2metre lengths. You can either add up all the wall lengths into one total, then divide by 2 to figure out the total number of profiles you need to order. Alternatively and if you want fewer joints in your coving/skirting, you can look at each length of wall and work out how many 2metre lengths will fit in the space. If you do it this way you may end up with more wastage.

Tip - Make sure to add a little bit extra to your order incase you make any mistakes with cutting!

How to measure for Contemporary Wall Panels

These panels come in standard 200cm x 25cm sizes. Generally these will be fitted side by side to fill a wall or area. Measure the overall width you want to cover (in cm) and divde by 25cm (which is the panel width) This will tell you how many panels you require.

Alternatively, you can work out how many panels you need by measuring your overall square meterage required. x2 panels = 1msq. Therefore if you have a wall of 12msq that you want to cover, times that figure by x2 and that will give you the total number of panels.

Tip - Always add a little bit extra to your order incase you make any mistakes with cutting!

If you need any help with your order please get in touch and we would be delighted to help.

How do I measure my walls for moulding?

It’s essential to ensure that your measurements are as accurate as possible before you buy, as we wouldn’t want you to order the wrong size or number of panels. You’ll need at least two people and a reliable tape measure that’s long enough to assess the height and length of each individual wall you want to put panels on.

Take notes of the measurements as you go, measuring from floor to ceiling and left side to right side on each section of wall. This includes any protruding or inset sections that you intend to install panelling over. Next, think about where you want the panels to be, and measure from the ground up to the desired height. Multiply that height by the length of the wall, and that’s how much panelling you’ll need for that section.

Repeat this for each individual wall and add up every figure to get the total amount of panelling you’ll need. Round up, allowing for around 5%-10% of wastage, to prevent ordering panels that are too short or not ordering enough. When measuring up, you’ll need to take plumbing, electrics, and any skirting boards into account. If anything needs to be re-sited, you must hire a professional to do this properly to prepare for installation.

Where can you use wall panelling?

There are many ways to use wall panels to your advantage to get the most out of them, in terms of both practicality and aesthetics. They’re a popular alternative to more traditional tiles in kitchens and bathrooms – though of course, they need to be waterproof. The majority of wall panels we sell are made from Purotouch, a water-resistant and shock-resistant material that’s durable enough to use outdoors as well as on interior walls.

One of the great things about wall panels is that you can install them pretty much anywhere to totally transform the space. Purotouch is also flexible, so you can even wrap the panelling around curved corners. You can use the panels to disguise unsightly utility boxes, or to enhance existing structural features like windows, fireplaces, inset walls, or built-in storage such as shelving.

The only limits are the layout of your home and your imagination, so why not put your creativity to the test and figure out where our beautiful wall panelling will serve your interiors best? Whether you use panelling behind a bed or sofa to distinguish separate spaces, or to dress up a dining room or other social area, we guarantee that our wall panels will look wonderful wherever you install them.

How high should wall panelling be?

In addition to the profile of the wall panelling itself, the height of the wall panels also has a huge impact on the overall visual effect. Whether you panel a section of the wall or go up to the ceiling, around the room or just one wall, keeping this feature in proportion to the rest of the room is key.

Though there are no strict design rules for wall panelling, most people prefer to stick to the ‘rule of thirds’ – which simply means capping the panel one third of the way up the wall, and leaving the upper two thirds unpanelled. For example, a three-metre wall would require one-metre panelling.

Of course, the most suitable height depends on the particular room you’re panelling and its specific features. Things like windows, fixed cabinets, and plumbing can affect the symmetry if the heights aren’t compatible. Floor-to-ceiling wall panelling only tends to look good in larger rooms with more light, or on one ‘accent wall’ only, while eye-level wall panels are a safe fallback for most rooms.   

Another safe option is ‘dado rail’ height, which is usually around one metre tall (regardless of the ceiling height). The original purpose of dado rails was to protect the walls of dining rooms and sitting rooms when people pushed back their chairs to stand up, so you can also achieve this effect by pushing your own chairs against the wall (gently!) and measuring a few inches above their backs. 

If you’re looking for something different, panelling two-thirds of the way up the wall can give the room a stately appearance. Alternatively, you could ‘extend’ the skirting board by installing low-height wall panels as a baseboard for enhanced kick protection, and match them to door frames. 

Product Gallery

3/4 height wall panelling allows you to break up a room, wether it’s to add texture or add another colour to your room. We offer many types of wall panelling, so be sure to take your pick on our website now! There is an option for every space and style and all of the panelling comes primed ready for you to paint the perfect colour.